Would you mind sharing with me any issues you are experiencing in the installation of gtag.js on your WordPress website? The manual method is difficult and requires some experience. Thanks to an external plugin, it is possible to accomplish this task. In this article, I will demonstrate exactly how to do this.
What is gtag.js OR Global site tag?
Global site tag, or gtag.js, is the JavaScript API used to deploy and configure Google Analytics and other Google Marketing products on a website. Using this code, Google Analytics tracks your website and provides valuable information, including the location of visitors, page views, traffic sources, demographics, bounce rates, and other information.
In addition to Google analytics, gtag.js can send event data to other Google Marketing products, including Google ads, Search Ads 360, Campaign manager, and Display & Video 360. In the past, the user had to install multiple scripts in order to send data to each Google marketing platform separately. Nevertheless, as the name implies, gtag.js is a Global Site Tag that enables easy integration of your website with all of the above-mentioned products.
The gtag.js API has the following syntax:
gtag(<command>, <command parameters>);Under <command> you can pass the following commands like config, get, set, and event. <command parameters> may vary according to the command. These command parameters are passed to the gtag() function.
How to Quickly Install Google Analytics Global Site Tag in WordPress (gtag.js) Using MonsterInsights
If you are already using Google Analytics on your website and want to use MonsterInsights, you should remove the tracking code from your theme first. It is important to note that if you add the code twice, you will end up with inaccurate reports.
In order to use the Google Global Site Tag with MonsterInsights, the user must already have an account with Google Analytics.
Using MonsterInsights Lite, it is possible to integrate Google Analytics gtag.js with WordPress. However, I highly recommend using the premium version since the Lite version only offers basic reports within the dashboard.
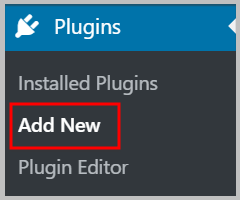
You would need to log into your WordPress admin area, click Plugins, and then click Add New to install Google Analytics with MonsterInsights.

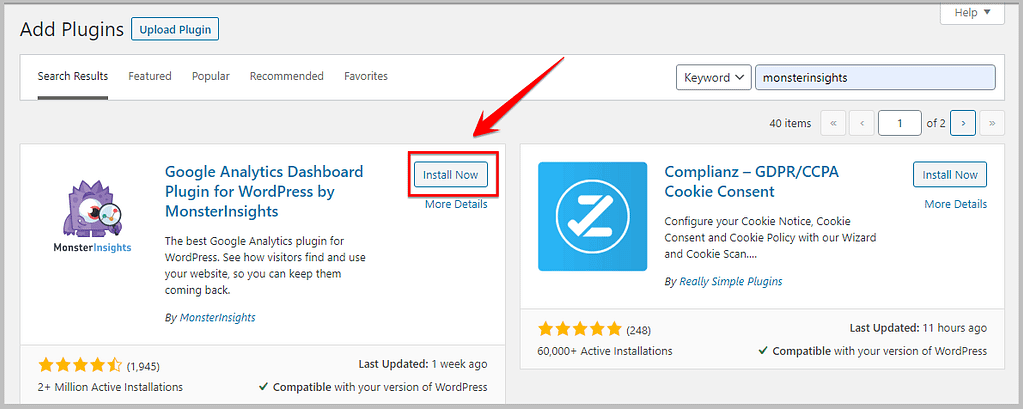
All the plugins available in the WordPress.org repository will be displayed to you. Search for the MonsterInsights plugin. If you find it, install and activate it.

As soon as you complete the installation of the MonsterInsights analytical plugin, you will be redirected to the welcome page. When you are there, click on the Launch Wizard button:


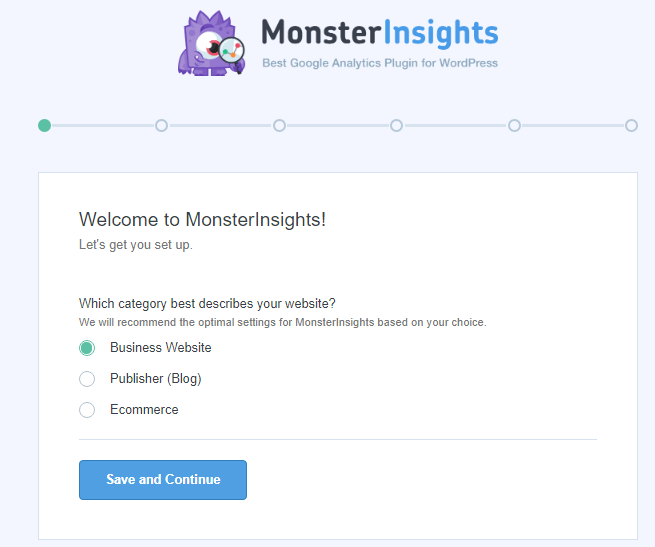
The Launch Wizard button will take you to the first phase of the plugin's installation. You will need to select a category that matches the type of business you are running:

Your next step will be to connect MonsterInsights to Google Analytics. You will need to click on the Connect MonsterInsights link.
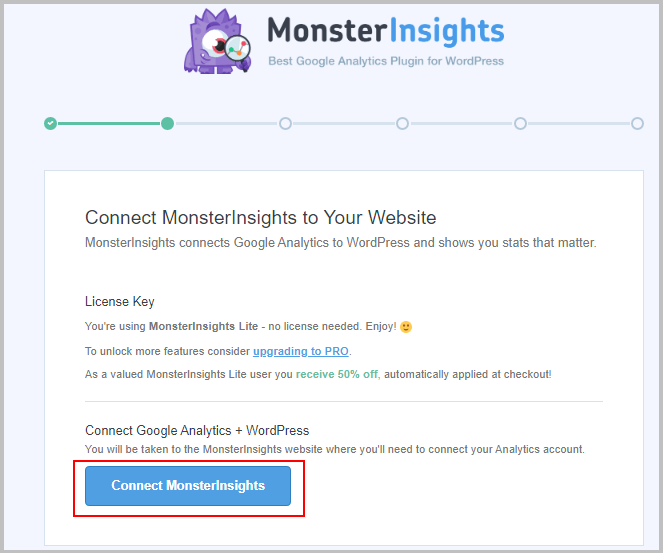

A new page will appear once you click on Connect MonsterInsights. This page requires the user to enter the account that they used to sign up for Google Analytics.
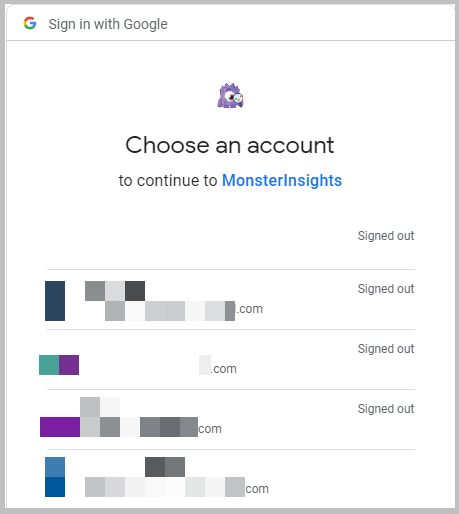

To save your changes, click the Save button. You will be asked to allow the plugin to access the information you have provided. Therefore, you should click allow and save changes.
That's it! You have now successfully installed the gtag on your website. You only need to do this once regardless of how often you make changes to the theme.


